Sunday, December 9, 2012

Christmas Cupcake Ornaments

Another fun ornament I made this Christmas season!! I didn't like the look of the styrofoam ball after "rolling" it in glitter...so I used my glue gun to fill in the entire top of each "cupcake" to give it a fuller look...and ofcourse the glitter stuck to that really well:) These made my youngest hungry for real cupcakes:)
I didn't use plain old glitter...I used glitter snow...the kind you use for your Christmas village.
I sure made a mess!! I lucked out when I found these "berries"...they're styrofoam also! In order to "hang" these on my tree, I can just thread a needle through the berry and tie!! I was clueless as to how messy this project would be! My fingers were covered in glue and glitter the whole time!! And the table and floor...and my lap...and pretty much everywhere;)
That being said though, I can't wait to make my next new ornament for the season:)

Sunday, November 25, 2012

Christmas Angel Ornaments made out of NOODLES!

It's that time of year to get crafty!!  These are my all-time favorite Christmas ornaments to make.  They are made out of NOODLES, hahaha, and a wooden bead for a head.  Also, the halo is a wedding ring party favor and beads; and these sweet angels hold the cutest little treasures!!  I love the "pearl white" paint I used for this craft.  So pretty!  My glue gun is my favorite crafting tool!!
 
 
I suppose I could've used real candy!  But these miniature candy ornaments were super cute and convenient!!
 
 
I used a variety of "treasures".  Some angels are holding little "gifts" that I found at Michael's...and other angels are holding little tea roses.  I hope to craft more in the coming weeks:)


Saturday, November 3, 2012

Halloween Door

Darn!!!  I missed being able to post this before Halloween!!!  But, I had to share, since it is time for me to take it down :(  I hate having to take apart anything I create!

I had fun decorating, and my boys loved this (my hubby too)!

 
Hope your "haunting" was happy!!  Now onward to all things Thanksgiving:)  I saw some really cute recipe ideas on Pinterest that I can't wait to try.

Saturday, August 25, 2012

Summer Floral Wreath

I finally made my Summer wreath.  Nevermind that the season is fading FAST!!  I am painfully aware that the stores are selling Fall and Halloween...but I fell in love with these beautiful PAPER flowers.  Bonus for me to have some leftover for scrapbooking...if I ever find the time to do THAT too!

 
Foam wreath, yarn, pins and flowers.


Wrap and pin the yarn every couple of inches so it won't unravel.


Then "pin" your flowers...


And viola!!  So bright and cheery:)  Sigh...now it's time to get serious about Back-to-School shopping....  Crafting will have to wait...until the next project I can "sneak" in.  ;) 


Monday, July 30, 2012

Towel Cake...take two!


Oh, I am so excited:)  I got to re-visit an old craft!!!  My cousin loved the first Towel Cake I made, and requested I make her one for an event at her Church.  Funny how it didn't take long at all to finish this!  I guess I had first time craft jitters a while back:o)


Beautiful !!  I hope I get to make this again soon.  Definitely one of my favorite things to create:)


Friday, July 20, 2012

Homemade Play-doh recipe...less salt!

Wow.  It has been HOT these past two days.  Over 100 degrees!  Crazy!!  So what do you do when it's too hot to play outside with your youngest??  Well, anything that is fun, for sure!!  That is why we decided to try a recipe for homemade play-doh.


Our modified recipe for play-doh:

2 cups white flour
1/4 cup salt
2 cups water
2 tablespoons vegetable oil

* Boil the water and oil and salt on the stovetop, then remove from heat and stir in flour until "doughy".

(some play-doh recipes online call for TONS of salt, but we found 1/4 cup worked just fine)

Then add food coloring.
(we separated the dough and made 2 different colors)


Don't forget to let it "COOL" before letting your little ones dig in:)


My little guy LOVED his new play-doh...and I LOVED being able to finish the laundry while he kept himself occupied:)


Monday, June 11, 2012

Our all time favorite cookie recipe.

These peanut butter cup cookies are one of my holiday "staples".  They are also my most requested.  I recently made them for a charity event at my son's school.  My boys were happy that I made an extra batch of cookies just for them:)


I use Betty Crocker's Recipe for peanut butter cookie dough:

1/2 cup butter
1/2 cup peanut butter
1/2 cup sugar
1/2 cup brown sugar
1/2 teaspoon baking soda
1/2 teaspoon baking powder
1 egg
1/2 teaspoon vanilla
1 1/4 all-purpose flour
*small bowl of sugar for rolling dough

*TIP~pre make and refrigerate dough for 1-2 hours (or even overnight) before rolling into balls.


While I'm rolling the dough, I'm giving it a good "sugar rolling". 


Don't forget to unwrap your chocolate prior to baking.  To determine how many pieces of candy you will need to unwrap, ROLL out ALL your dough FIRST before baking.  Then set the candy pieces in front of your little "helpers" to unwrap.  My youngest LOVES helping unwrap.  Ofcourse, he probably loves it more that he has a separate pile of candy for him to unwrap and eat as he goes;)


Once I am ready to bake, I pop the dough into mini muffin tins, then bake at 375 for 9 minutes.  As soon as I take the tins out of the oven, I push a peanut butter cup onto the tops of each cookie.  Then I quickly place the tin in the freezer to "cool" for 6 minutes.  Then I gently lift the cookies out of the tin and place on a cooling rack to help "set" the chocolate.  BE careful.  The chocolate will slide right off the cookie if you aren't too careful;)  Give these cookies a mininum of 2 hours before packaging, to ensure chocolate is set.

I LOVE making these cookies!!! They are so EASY! You can have everything ready before you actually start baking!!  Enjoy:)

Tuesday, June 5, 2012

Beautiful Towel Cake for Mother's Day/Showers/anytime, really.

Around Mother's Day this past year, I made a "Towel Cake" for a fundraiser at my son's school.  I was definitely nervous making this, as I've never made one before, and it turned out really pretty.  I didn't want to raffle it off.  ;)


PHEW!!!!  All done:)  I used corsage pins to keep the towels in place, and I had fun with ribbons and flowers.  I only wish my camera took better pictures, and that my husband's mountain dew bottle wasn't in the background!  That man some days!;)


Monday, June 4, 2012

A pretty cool 3-D floral card.

It's been a rough couple of weeks for me with hurting my neck and back.  Don't ask.  I have no idea what I did.  I just woke up with a kink in my neck and it escalated from there.  In the meantime, I have been stuck on the couch with an ice pack.  I've been going a little stir crazy, but was able enough to put this Floral Birthday Card together for my girlfriend's 40th birthday.  I really like the way it turned out, and since I couldn't shop for scrapbooking supplies, I had to settle for what I had on hand (eek, scary for me;)   Check it out:


This is the paper I had on hand...hahaha, I did make some mistakes and had to scrounge around for more.  It happens.  Especially when you have an idea but can't quite make the pieces connect;)  But then inspiration took over...


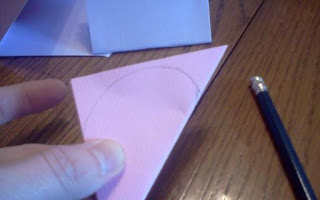
I started folding squares into fours, and then into a triangle...


Then I drew the shape I wanted to cut the flower edges into....


I cut out my shape...


...and OOPS!  There goes that flower!  Note to self, pay attention to the center of the paper when folding so I know where to cut...


That's better:)  I only ended up needing 6 flower shapes.


I next glue-gunned some buttons for "stamens"...


Then I free-handed a "vase" (while staring at my collection of vases)...


OH!  and then I realized I would have to "scrapbook" the inside of my card BEFORE I could put together the front of it.  I didn't want to smash any of my pretty flowers;)
 

THERE!  The front of my girlfriend's card:)  I did attach some pink ribbon to the "dear friend" tag, and located some artificial leaves to mix up the look.  It's very 3-D.  I love it:) 
It sure felt nice to be able to craft again!


Saturday, April 7, 2012

Having a Peep party:)

So how do two Mom's stay out of trouble while their sons are having a playdate???  We bake:)  I am loving this idea of baking while our boys are at play.  I am having a blast looking up new recipes I've wanted to try.  Today's baking adventure~~PEEPS.  In the spirit of Easter, and in needing to make dessert for my niece and nephews, I found this very cool idea.  Did you know there is a PEEPS website too??? 
I am very proud of how my cake turned out, especially after having a baking disaster.  MY cake did not rise to the occassion.  It was most definitely NOT looking great, and needed a ton of frosting.


My POOR cakes!  I think you can tell what I'm talking about;)


This yellow cake is mine~~I feel all better, it's looks presentable now!!


AND here it is~~my PEEPs Easter Cake:) I love it!!!


Now what to do with all those left over PEEPS???


I KNOW!  Melt some chocolate and coat in sprinkles!!


And then go crazy and find some toffee chips for the rest~~YUM!!
I loved how my girlfriend and mine's "baking date" turned out.  And I know our boys had the best time too!!